Create a Course Instance: Exam Information
Staff holding the Input & Amend Course Details role will be required to set-up and maintain course instances including Exam Information.
The Exam Information captured as free text during the Course Proposal and Approval process can now be recorded in a structured format. This information will be used by Registry to produce the Exam Timetable and is therefore critical.
In addition the Exam Information will be displayed in the online Course Catalogue available to student's via the DRPS website.
The following example describes the EUCLID process for recording Exam Information for a Course Instance.
Step 1
Retrieve the Course Summary screen for the course being amended. This can be done through the Input & Amend Course Details Task for newly approved courses requiring initial set-up or using the Amend Details link in the Curriculum Management homepage for open courses.
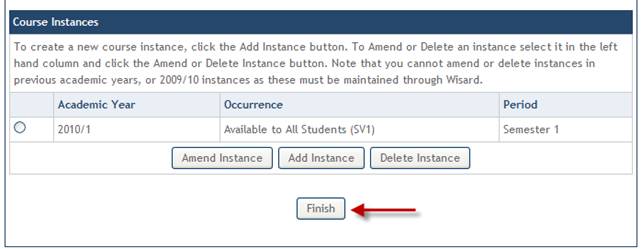
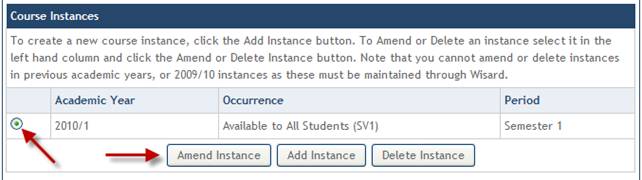
From the Course Summary screen scroll down to Course Instances and select the Instance to be amended using the radio buttons in the left hand column.
Click the ![]() button to open the Amend Course Instance screen or alternatively click the
button to open the Amend Course Instance screen or alternatively click the ![]() button to Create a Course Instance.
button to Create a Course Instance.
Step 2
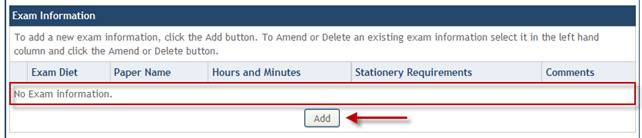
From the Amend Course Instance screen scroll down to the Exam Information section.
The Exam Information for this instance has not yet been recorded, to add the details click the ![]() button.
button.
Step 3
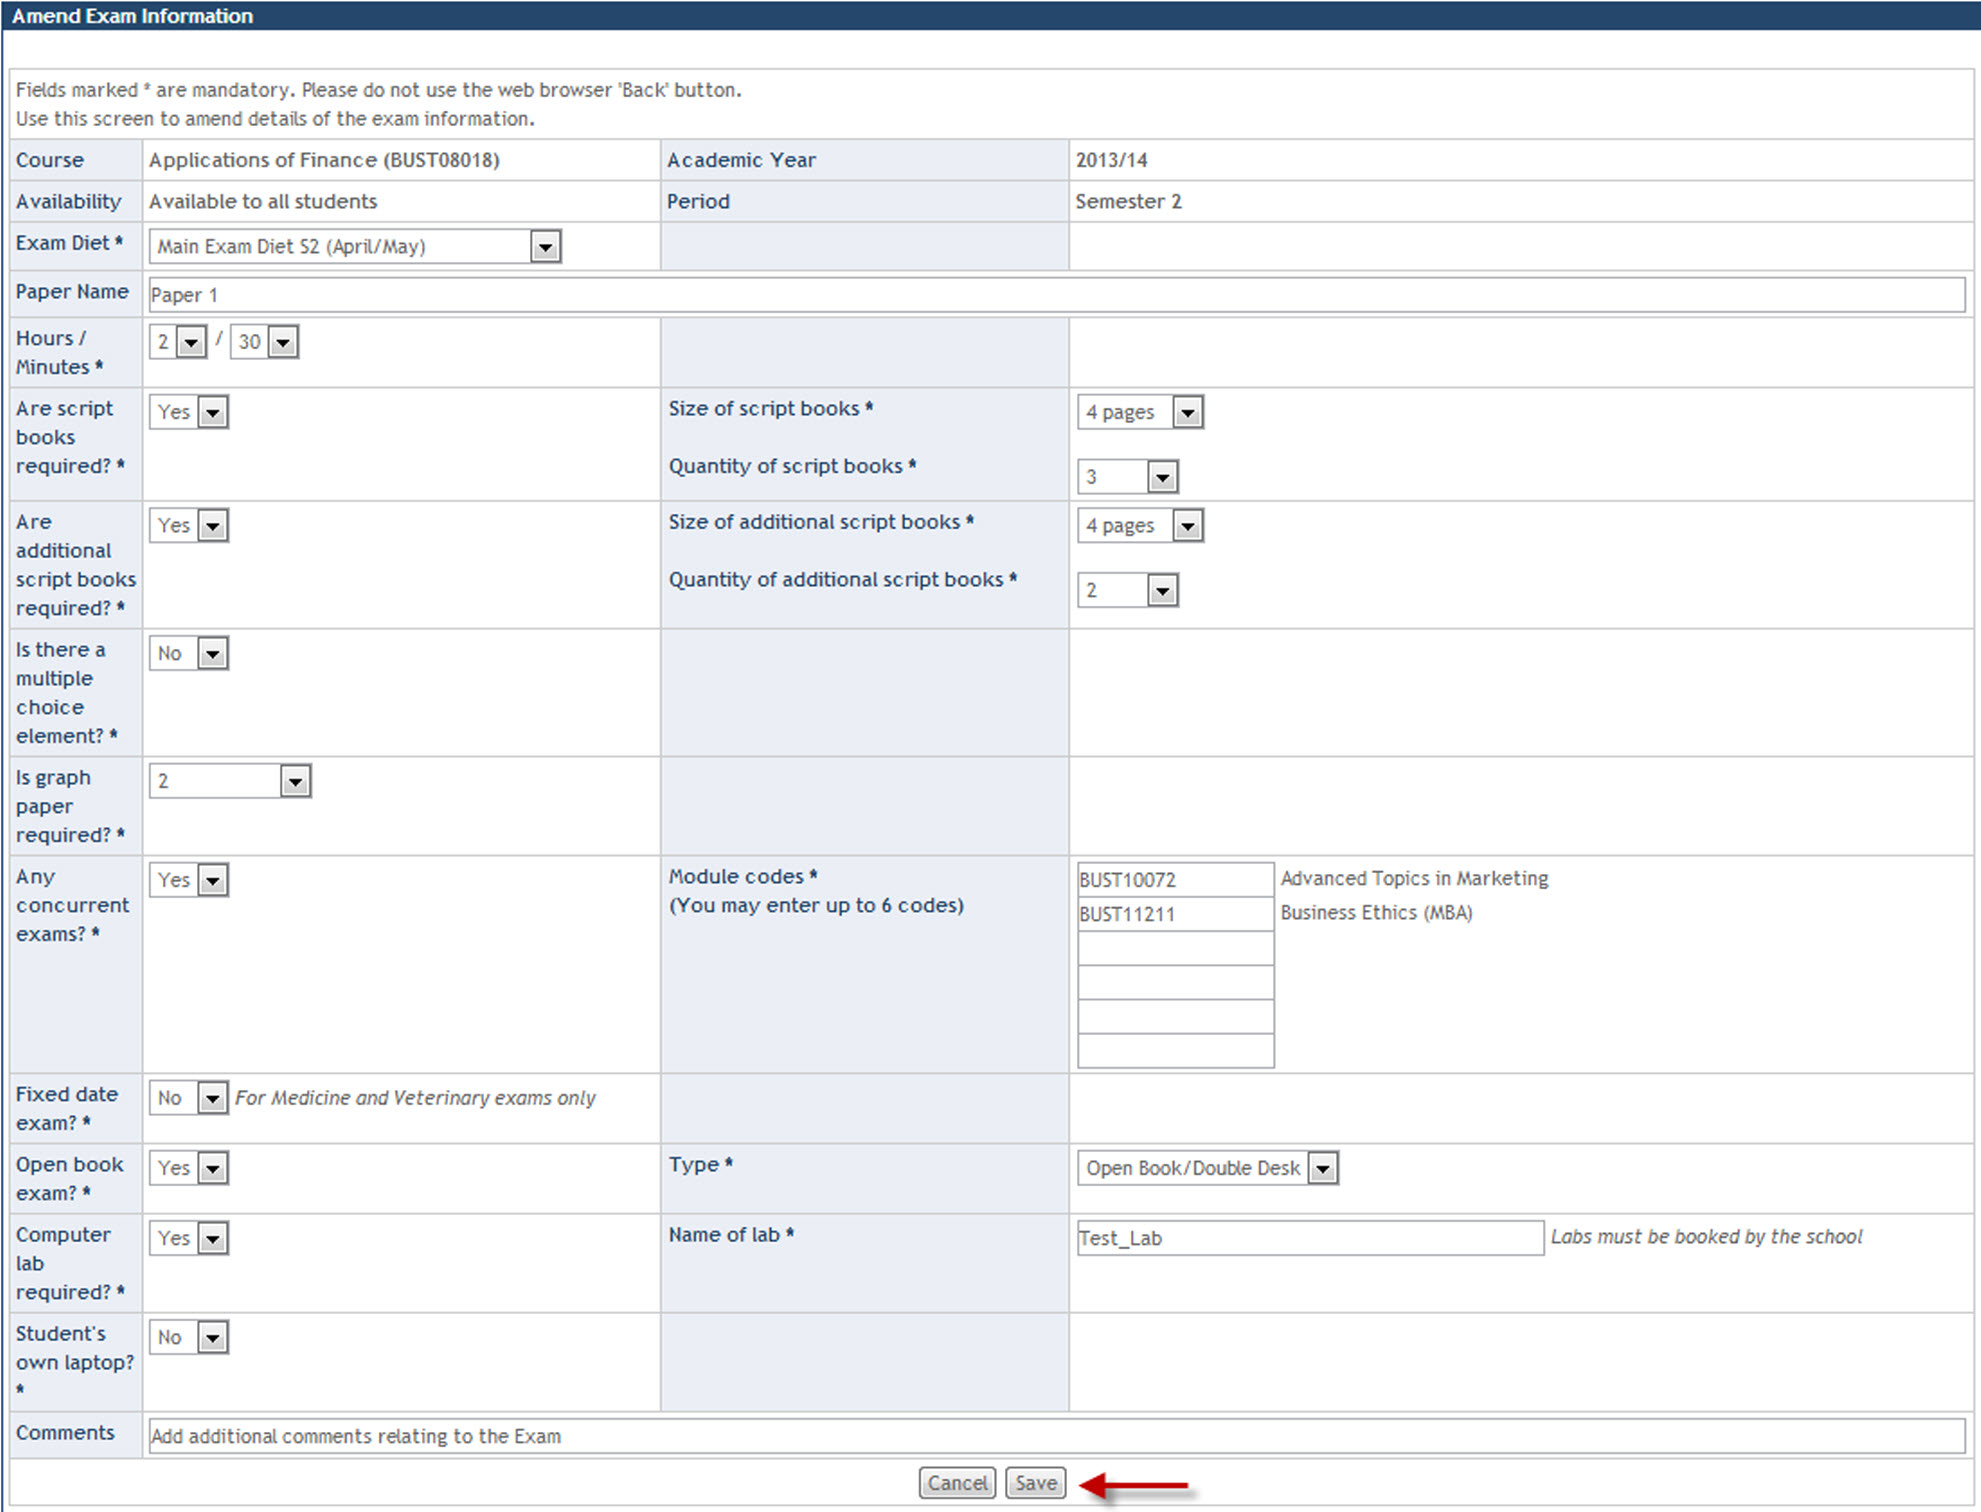
The Add Exam Information screen is displayed.
There are 14 fields to complete, 11 of which are mandatory*:
Field Name |
Description |
| Exam Diet* | Select Semester 1, Semester 2, Resit or non standard diet |
| Paper Name | Enter a descriptive paper name |
| Hours/Minutes* | Duration of exam in hours and minutes |
| Are Script books required?* | Select Yes/No If Yes: Please then select the Size and Quantity required. |
| Are Additional Script books required?* | Select Yes/No If Yes: Please then select the Size and Quantity required. |
| Is there a Multiple Choice required?* | Select Yes/No |
| Is graph paper required?* | Select not required or the number required. |
Any concurrent exams?* |
Select Yes/No If Yes: Use the dynamic list to select the concurrent module code |
| Fixed date exam?* (For Medicine and Veterinary exams only) |
Select Yes/No |
Open book exam?* |
Select Yes/No If Yes: Select the Type |
Computer lab required?* |
Select Yes/No If Yes: Name the lab (*Labs must still be booked by the school*) |
Student's own laptop?* |
Select Yes/No |
| Comments | Any additional comments |

Step 4
Using the help text provided for each field complete the Exam Information details and click the ![]() button.
button.
Step 5
The details of the first Exam are now displayed in the Course Instance Summary screen and can be maintained using the ![]() and
and ![]() buttons.
buttons.
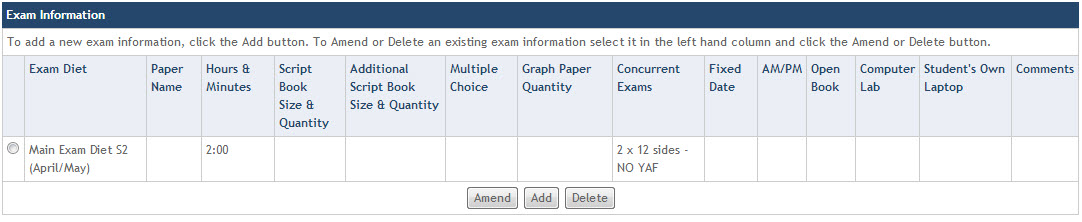
To add additional Exam Information (e.g. 2nd Diet) click the ![]() button and repeat the above process.
button and repeat the above process.
Step 6
When you have finished editing the course instance details (Exam Information, Teaching Load, Compulsory, Elective and First Class details) click the ![]() button at the bottom of the screen.
button at the bottom of the screen.
Step 7
Scroll to the bottom of the Course Summary screen to view the Course Instance.
Use the ![]() ,
, ![]() and
and ![]() buttons to edit the course instance.
buttons to edit the course instance.
Click the ![]() button to make the course instance available and to exit the Course Summary screen.
button to make the course instance available and to exit the Course Summary screen.